Stop production and preserve evidence before you polish or scrub the mould. By following a controlled inspection, cleaning, repair, and restart process, you can separate harmless surface oxidation from pitting, leakage, dimensional damage, and corrosion that will keep returning.
Key takeaways
- Stop production and map corrosion before cleaning or polishing.
- Trace moisture, chemicals, condensation, and handling as possible corrosion sources.
- Clean light oxidation without rounding edges or changing cavity dimensions.
- Inspect pits, shut-offs, channels, and moving details before approving restart.
Stop the Mould and Map the Corrosion Before Cleaning
Stop production as soon as corrosion appears; do not polish the cavity and run another shot. Surface rust can hide pits that mark the plastic, increase demoulding force, or alter a critical dimension.
- Isolate the mould and record the machine, resin, cooling-water condition, last cleaning product, and time the corrosion was found.
- Stop the suspected moisture source. Drain residual cooling water, wipe away condensation, and remove wet release-agent residue, packaging, or contaminated cloths.
- Perform mould disassembly far enough to expose parting lines, vents, ejector details, slides, threaded holes, and cooling-channel connections. Tag each component so its original position is known.
- Photograph every affected area before cleaning. Include a scale in each image and mark cavity numbers, inserts, and channel locations.
- Start corrosion mapping by marking surface rust, dark staining, pits, crevice attack, and any area crossing a shut-off, sealing land, or textured surface.
- Dry the tool with clean, oil-free air and inspect under magnification. If channels are involved, arrange borescope inspection plus flow or pressure testing; exterior cleaning cannot reveal internal deposits or pinhole leakage.
- Quarantine chloride-bearing cleaners, hydrochloric-acid products, and abrasive tools until the damage is classified.
This DIN 1.2085 corrosion response separates removable staining from metal loss. Do not judge the tool by colour alone: photograph the evidence, preserve the map, and decide whether controlled cleaning is safe before removing material.
Find the Moisture, Chemical, or Handling Cause
Corrosion returns when moisture or a corrosive residue remains after cleaning. DIN 1.2085 (X33CrS16) contains about 16% chromium, but it is not immune to chloride-bearing water, acidic resin, stagnant moisture, or trapped contamination.
Trace the source before polishing again:
- Check cooling fittings, plugs, and channels for a cooling-water leak, restricted flow, pinhole damage, or water left after shutdown.
- Look for condensation after temperature changes, especially inside cavities, around inserts, and beneath wrapping.
- Test cooling water for chlorides, pH, conductivity, and biological contamination; clear deposits and avoid stagnant periods.
- Remove mould-release residue, machining fluid, fingerprints, and aggressive cleaner from crevices and parting lines.
- Inspect joints between 1.2085 and dissimilar metals, including screws, inserts, and fittings, where wet contact can create galvanic attack.
- Review resin handling if water-containing or acidic resin contacts the mould surface.
A borescope plus flow or pressure testing can expose corrosion inside cooling channels that surface cleaning will miss. Localised rust around a fitting or insert points to a source, not a polishing problem.
After restoration, dry every cavity, channel, thread, and crevice with clean, dry air. Bring the mould above the dew point before wrapping it, then apply a compatible corrosion film or vapour-phase packaging; remove that protection completely before moulding. Record the cause and shutdown steps so the same damage does not return.
Clean Light Oxidation Without Damaging the Tool
For light oxidation, use a chloride-free cleaner, dry the surface, then apply a nylon brush or controlled polishing with a non-contaminating abrasive. Work gently enough to remove the film without rounding edges, shut-offs, parting lines, or texture.
| Method | What it does | When it applies |
|---|---|---|
| Chloride-free cleaner and nylon brush | Lifts residue and loose surface oxidation without embedding iron | First choice for thin staining and flash rust |
| Controlled polishing | Removes bonded staining with a clean, suitable abrasive | When brushing leaves a visible film |
| Chemical rust remover | Dissolves oxidation but introduces chemical-control risks | Only after checking the product’s chloride content and technical data |
| Steel wool, carbon-steel wire brush, or contaminated abrasive belt | Can embed iron and trigger apparent re-rusting | Do not use on the mould surface |
If you use a rust remover, rinse every treated area thoroughly, dry it completely, and apply corrosion protection. Never use hydrochloric-acid cleaner or a chloride-containing descaler on this steel; pitting and crevice corrosion can begin beneath residue.
Stop cleaning and measure the surface when:
- A dark spot remains after gentle cleaning and feels rough under magnification.
- A pit reaches a cavity texture, sharp edge, shut-off, slide, or parting line.
- Polishing starts changing a dimension, mismatch, or sealing contact.
- Corrosion appears inside vents, cooling channels, threaded holes, or ejector details.
A stain can be cosmetic; a pit can mark the plastic, increase demoulding force, or create flash. Do not polish until the colour disappears.
Inspect Pits, Shut-Offs, Channels, and Moving Details
Determine damage by measuring the steel, checking fit, and comparing mould behaviour with the approved drawing or last known-good inspection record. Colour alone proves little: inspect cleaned surfaces under magnification, then record pit depth, affected area, and any change in critical cavity dimensions with a calibrated depth gauge, micrometer, CMM, or suitable gauge.
Inspect each detail that controls part quality:
- Cavity texture and edges: look for pitting that transfers blemishes, changes gloss, increases demoulding force, or alters wall dimensions.
- Parting line and shut-off: apply engineer’s blue and close the mould; uneven contact, light gaps, or new flash indicate lost flatness or sealing geometry.
- Vents and sharp edges: check for blocked passages, rounded edges, or corrosion that changes gas escape and filling.
- Ejector pins, slides, and guide details: check scoring, binding, uneven movement, and increased clearance.
- Threaded holes and insert joints: look for crevice corrosion, trapped moisture, or galvanic attack around dissimilar metals.
Do not polish pitting until the stain disappears. Compare the measured depth with the available polishing or re-machining allowance; repeated blending of a shut-off or parting line can remove steel-safe geometry and create flash or leakage.
For cooling channels, use a borescope where accessible, then perform flow and pressure tests. A restricted flow, pressure loss, or leakage separates harmless staining from deposits, hidden corrosion, or a pinhole breach. Stop cleaning and obtain an engineering decision if a sealing face, cavity dimension, or moving fit falls outside its approved tolerance.
Repair, Verify, and Protect the Mould Before Restarting
A mould needs professional restoration when corrosion reaches a parting line, shut-off, sealing face, cavity texture, vent, or moving fit. Replace the affected insert or steel when pitting has removed required stock, a crack is present, or restoring dimensions would cost more than producing a sound replacement.
1. Record the material certificate before grinding, welding, or re-hardening. Commercial DIN 1.2085 is often supplied at about 280–325 HB, or 29–34 HRC, but the mill and product form determine the guaranteed hardness.
2. Send damaged areas for metrology inspection. Measure cavity dimensions, shut-off contact, parting-line flatness, vent depth, ejector fits, and cooling-channel integrity against the approved mould drawing.
3. Use re-machining for shallow damage that leaves enough steel for the specified geometry. Do not repeatedly blend a corroded shut-off; it can create flash, leakage, or unsafe steel conditions.
4. Treat welding or laser cladding as engineered repairs, not routine rust removal. A qualified procedure must address the sulfur-alloyed martensitic structure, compatible filler, heat-affected-zone hardness, cracking, distortion, polishing, and texture.
5. Run a first-off moulding trial only after approval of dimensions and movement. Check flash, short shots, leakage, ejection marks, surface texture, and part dimensions before releasing production.
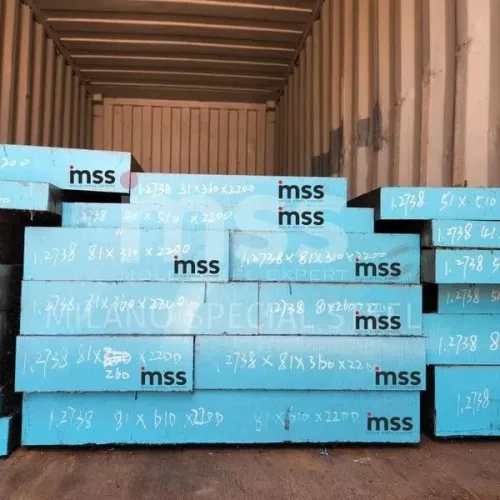
For replacement stock, give Milano Special Steel, Plastic Mold Steel Expert the required dimensions, form, and certificate requirements instead of ordering by grade name alone.
Dry cooling circuits, crevices, and the mould surface completely. Warm the tool above the condensation point before wrapping, then use compatible storage film or vapour-phase packaging and remove it before production.
Related product
 | DIN 1.2085 STEEL DIN 1.2085 steel is a corrosion-resistant, pre-hardened plastic mold steel with excellent wear resistance. View product → |
Frequently asked questions
What should you do first when a DIN 1.2085 mould corrodes?
Stop production, document the affected areas, and map the corrosion before cleaning or polishing the mould.
How can you find the cause of corrosion on a DIN 1.2085 mould?
Check for moisture, condensation, contaminated cooling water, cleaning chemicals, storage conditions, and handling practices.
How should you clean light oxidation from the mould?
Use a controlled cleaning method that removes oxidation without rounding cavity edges, damaging shut-offs, or changing critical dimensions.
Which mould areas need inspection after corrosion?
Inspect cavities, pits, shut-offs, parting lines, cooling channels, ejector details, slides, and other moving components.
When can you restart a corroded DIN 1.2085 mould?
Restart only after repairs, dimensional and functional checks, cleaning, and application of suitable corrosion protection.